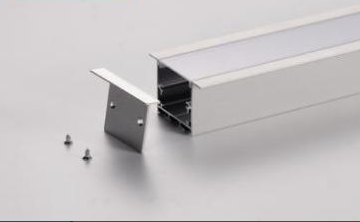
Installing an led channel is an excellent way to add professional-grade lighting to your residential or commercial space. Whether you want to enhance kitchen cabinets, accentuate architectural features, or create ambient lighting, understanding the installation process ensures you achieve both aesthetic appeal and functional performance. This comprehensive guide walks you through every stage of the installation, from planning and material selection to final testing and troubleshooting.
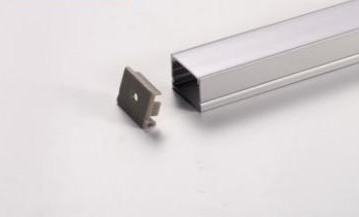
Installing linear led lighting requires careful preparation and attention to detail. The quality of your installation directly impacts the longevity, brightness, and visual appeal of your lighting system. By following this guide, you will gain the confidence to handle your led channel profile installation with precision, avoiding common mistakes and maximizing your investment's value.
Planning and Preparing Your Space
Assess Your Installation Area
Before purchasing your aluminum led housing, measure the exact length and dimensions of the space where you intend to install the linear led lighting. Use a measuring tape to record the dimensions accurately, accounting for corners, bends, and any obstacles that may affect placement. This measurement ensures you purchase the correct length of led channel profile and accessories, minimizing waste and unnecessary returns.
Evaluate the surface where the led channel will be mounted. Clean the area thoroughly to remove dust, grease, and debris that could compromise adhesion or mechanical fastening. If you are mounting the aluminum led housing on uneven surfaces, plan for leveling or surface preparation before installation begins.
Gather Your Materials and Tools
Collect all necessary components for your led channel installation project. You will need the led channel profile itself, LED strip lights designed to fit within the aluminum led housing, power supply units rated for your specific lighting requirements, wire connectors, and end caps for the profile. Additionally, prepare installation tools such as a level, screwdriver, drill with appropriate bits, cutting saw if modifications are needed, and safety equipment including gloves and eye protection.
Having all materials organized and ready before starting the installation process saves time and prevents interruptions. Check that your linear led lighting strips are compatible with your chosen led channel profile, ensuring proper fit and optimal light distribution.
Installing Your LED Channel
Mounting the Aluminum LED Housing
Begin by positioning your aluminum led housing along the marked installation path. Use a level to ensure the led channel profile is perfectly horizontal or vertical, depending on your design intent. Mark the mounting points carefully on the wall or surface, maintaining consistent spacing between fasteners for structural stability and professional appearance.
Drill pilot holes at your marked points to prevent surface damage and ensure accurate fastener placement. If using wall anchors, install them according to manufacturer specifications. Secure the aluminum led housing firmly to the surface using appropriate screws or brackets, checking alignment frequently throughout the mounting process to maintain perfect straight lines.
Installing the LED Strip Inside the Channel
Once the led channel profile is securely mounted, prepare the LED strip for installation by cleaning the contact surface inside the aluminum led housing. If your linear led lighting includes adhesive backing, peel the protective liner carefully. Position the LED strip at one end of the channel and press it firmly, working gradually toward the opposite end to ensure complete contact and eliminate air gaps.
For strips without adhesive, use appropriate mounting clips or guides provided with your led channel. Ensure the LED strip is centered and properly seated within the profile, as this affects light distribution quality. Connect the power leads from the LED strip to your power supply unit, ensuring all connections are secure and properly insulated.
Electrical Connections and Final Setup
Connecting Power and Control Systems
Route electrical cables from your LED strip through the led channel profile or along designated pathways to reach your power supply. Use cable management clips or conduit to maintain a professional appearance and protect cables from damage. Connect the positive and negative wires from the linear led lighting to your power supply, following color-coded connections precisely to prevent polarity errors that could damage your components.
If your system includes dimming controls or color-changing functionality, install the appropriate control modules and connect them according to manufacturer wiring diagrams. Test all electrical connections before permanently securing cables in place. Install the aluminum led housing end caps to provide a finished appearance and protect internal components from dust and debris.
Testing and Troubleshooting
Switch on your power supply to verify that the led channel installation functions correctly. Check that all sections of the linear led lighting illuminate evenly and at the intended brightness level. Walk around your space at different times of day to evaluate how the lighting affects the ambiance and functionality of your area.
If you encounter issues such as uneven lighting, flickering, or sections that do not illuminate, first verify all power connections are secure and properly polarized. Check that your power supply capacity matches the total wattage of your LED strip installation. If problems persist, test individual segments of the led channel profile to isolate faulty components. For persistent electrical issues, consult professional installation services to ensure safety and proper system operation.
FAQ
What is the difference between surface-mounted and recessed LED channel installations?
Surface-mounted led channel profiles sit on top of walls or surfaces, creating a visible architectural element that adds visual interest. Recessed aluminum led housing is installed within grooves or cavities in walls and ceilings, providing a seamless, integrated appearance with the led channel profile hidden from view. Both installation methods work effectively, and your choice depends on your aesthetic preferences and space constraints. Surface-mounted linear led lighting is generally easier to install and modify, while recessed installations offer a more refined, contemporary look.
How do I extend a LED channel beyond its original length?
Most led channel profile systems include connector pieces that allow you to extend installations across longer distances. Purchase additional aluminum led housing sections and compatible connector pieces designed for your specific profile type. Align the connector with the ends of two separate sections of led channel and secure according to manufacturer instructions. Extend your linear led lighting strip across sections by connecting multiple strips end-to-end using appropriate connectors, ensuring all power connections remain secure and properly configured for your total system length.
Can LED channel be installed outdoors?
Yes, weather-resistant aluminum led housing and outdoor-rated linear led lighting components are available for exterior installations. Ensure you select materials specifically rated for outdoor use, as they feature superior protection against moisture, temperature fluctuations, and UV exposure. Install appropriate seals and gaskets within your led channel profile to prevent water infiltration. Use waterproof power supplies and connectors, and follow all outdoor electrical safety codes and regulations for your region to ensure reliable, safe long-term operation.
 EN